How it works
HorizonGram leverages Telegram's cloud infrastructure through the use of a dedicated bot to create a custom, unlimited storage solution.
The application communicates directly with the Telegram bot, issuing commands such as uploading or downloading files. The bot then handles these tasks by organizing the files into specific topics within a Telegram group, ensuring the files remain structured and easy to manage.
HorizonGram interacts with the bot via Telegram's API, which acts as the communication interface for executing commands like file uploads and downloads.
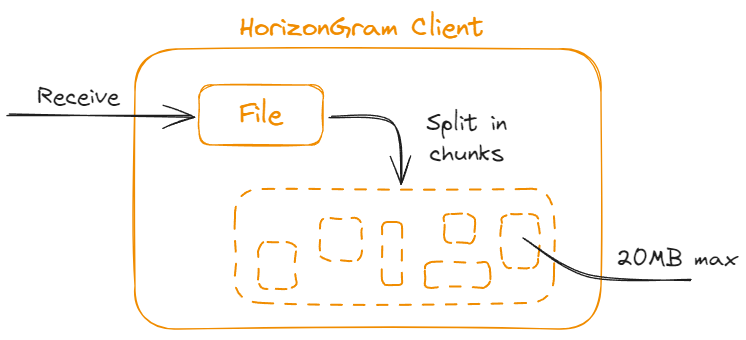
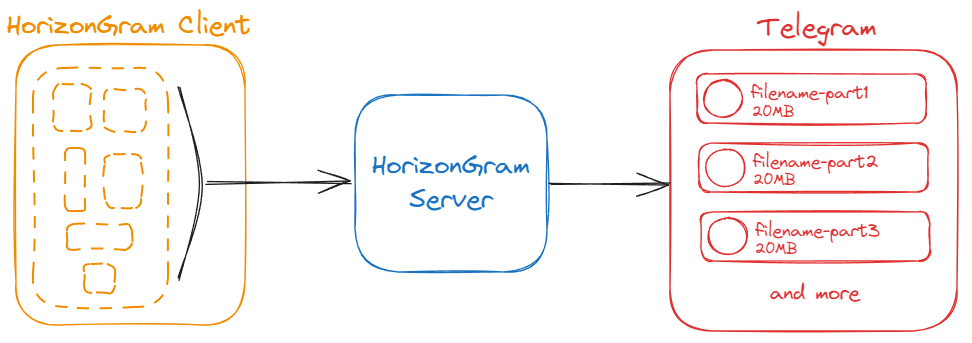
However, due to the API's file size limitations, which are relatively low, HorizonGram employs a solution to manage larger files. Each file is divided into segments, with a maximum size of 20MB per portion, allowing the platform to bypass these restrictions and efficiently store and retrieve large data sets. The bot organizes these file segments into a dedicated Telegram group.
When a file download is initiated, HorizonGram retrieves all the individual segments stored on Telegram and merges them back together to reassemble the complete file. This reconstruction process ensures that users can seamlessly access and utilize their files as if they were never fragmented.
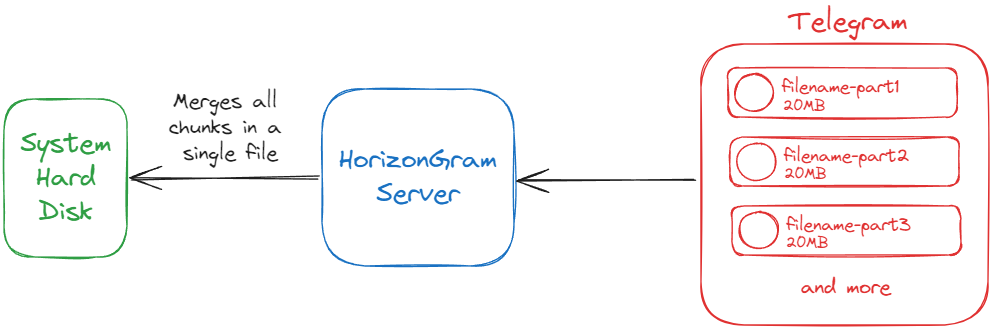
Each fragment is associated with a unique message ID on Telegram, as each file piece is stored as a separate message. To download and reconstruct a file, HorizonGram retrieves all the necessary message IDs corresponding to the file's fragments. These IDs, or metadata, are stored in Firebase Realtime Database, a cloud-based solution that securely tracks and manages all metadata for efficient file reconstruction and retrieval.
This metadata management ensures that HorizonGram can seamlessly reassemble the file from its fragments, providing users with smooth access to their complete files.
Files
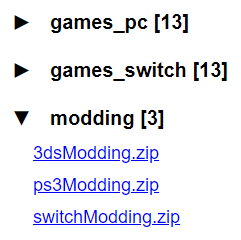
To see your uploaded files, click on the “Your files” section.
All uploaded files divided by folders will be shown. If you have just set up HorizonGram and haven't uploaded anything yet, you will see a plain white page.
Clicking on a file will open a popup giving the opportunity to download or delete it. Deletion is irreversible.
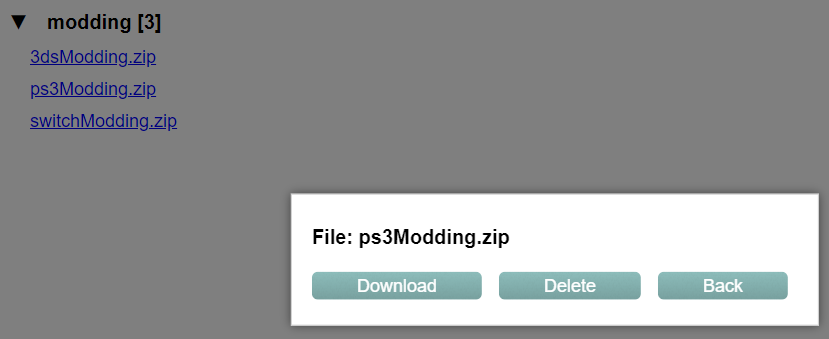
Files cannot be renamed or moved to other folders unless deleted and re-uploaded.
Folders
Folders that organize files can be viewed in the same way that uploaded files are viewed, so by clicking the “Your files” section.
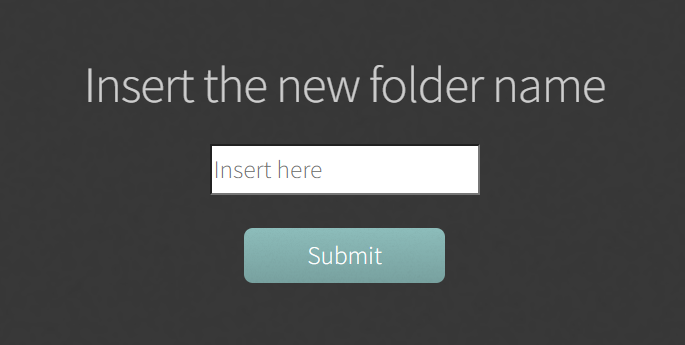
You can create new folders by clicking the “New folders” section.
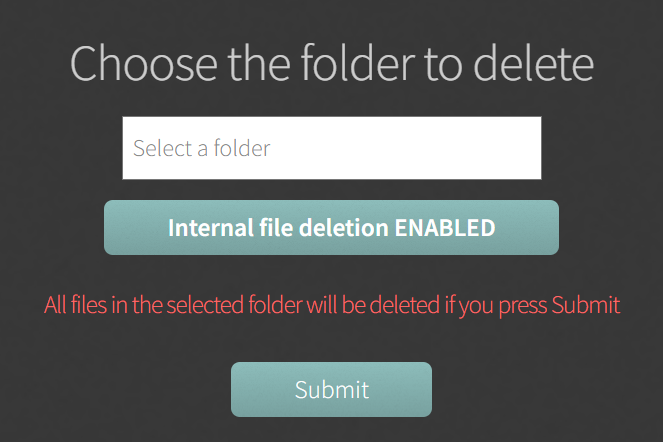
For deletion, on the other hand, click the “Delete folder” section.
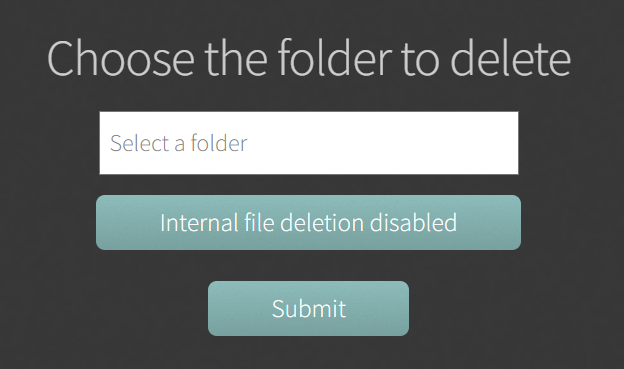
Folder deletion can be performed if the folder appears to be empty.
If it contains files and you want to force deletion, there is a button named "Internal file deletion disabled" that enables forced deletion. Forced deletion also involves deleting the files contained in the folder.
Folders cannot be renamed.
Upload
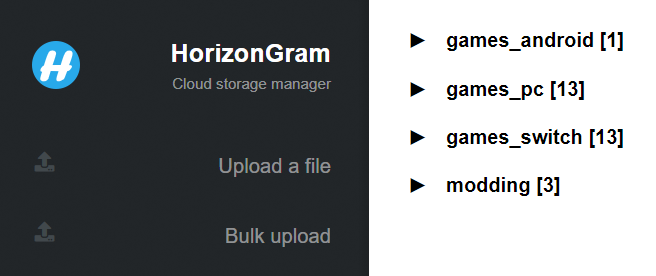
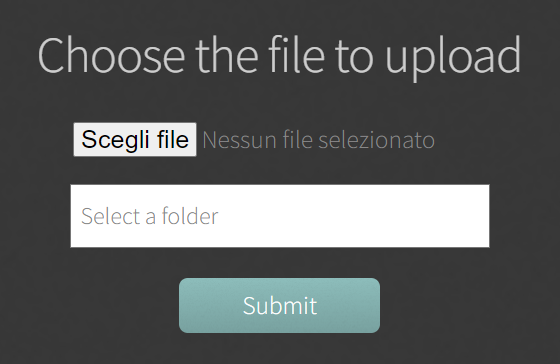
You can upload one or more files by selecting the appropriate section.
Clicking on “Upload a file” will allow you to upload a single file.
Clicking on “Bulk upload” will allow you to upload multiple files with one click.

Select files to upload, confirm and choose a folder.

Pressing submit button, the upload status will appear: just sit and wait.
The number of chunks shown indicates the number of fragments to be loaded. The loading screen indicates the number of chunks uploaded out of the total chunks to be uploaded.

Note
Starting from version 1.4, before uploading files it is advisable to indicate the upload connection speed in an appropriate selection field.
You can check your connection speed on Speedtest (check the UPLOAD speed in Mbps).
Download
You can download a single file by going to the “Your files” section, opening a folder, and clicking on a file: a download button will appear and start the download.
After the download is completed, the local path where the file was saved will be shown.

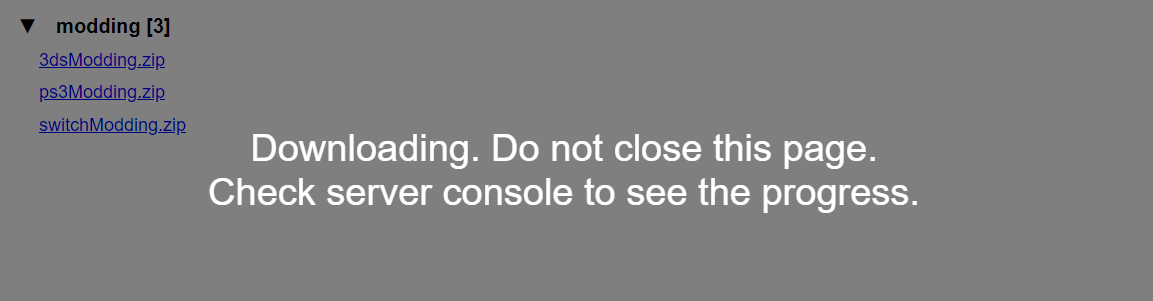
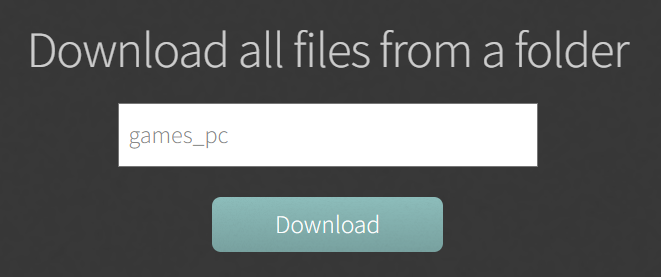
You can even download an entire folder! Just click “Bulk download”, choose the folder and wait for it to load! Simple, isn't it?
Note
Starting from version 2.1, you can enable scheduled deletion of the folder you are downloading.
The folder will be deleted after a few minutes, set via an appropriate parameter during the configuration of the config.json file.
Note
The downloaded files will always all end up in the download folder set during HorizonGram setup.
The server will replicate the same structure you have in the cloud, so if you download a file belonging to a folder called X, then X will be created in your download path and the downloaded file will be placed inside it.
Upload patterns
Suppose you want to backup several files: what is the best way to upload and manage them through HorizonGram?
There are some loading patterns to adopt in order to efficiently manage your files. However, in case you want to upload a few files or a single file, continue as usual.
Upload a folder containing only files
Suppose we want to upload such a folder:
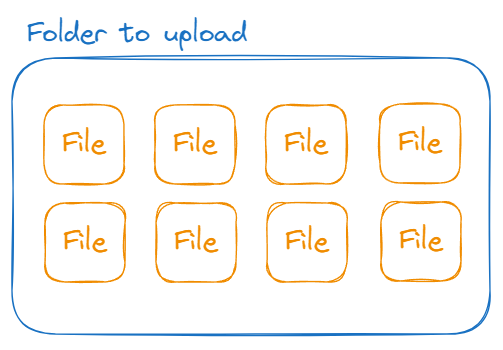
The best solution consists of:
- Create a folder on HorizonGram with the same name as the folder to be uploaded
- Go to "Bulk upload"
- Selects all files in the folder to be uploaded
- Select the created folder
- Confirm by pressing the submit button
Upload a folder containing files and folders
Suppose we want to upload such a folder:
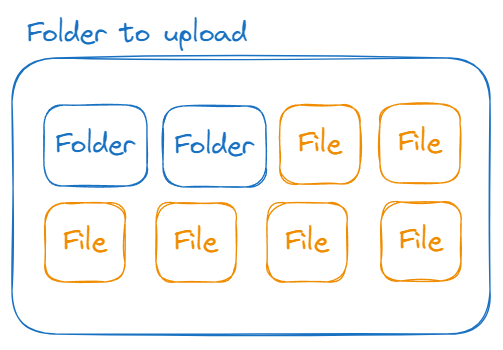
The best solution consists of:
- Select all the contents of the folder to be uploaded (including subfolders) and create a zip archive named "Contents.zip"
- Create a folder on HorizonGram with the same name as the folder to be uploaded
- Go to "Upload a file"
- Select "Contents.zip"
- Select the created folder
- Confirm by pressing the submit button
Select a profile
Available from version 2.0
If you have just installed or upgraded HorizonGram v2.0 or higher, it will start with the first profile declared
in the config.json file.
If you have added new profiles, you can change the profile that HorizonGram will start with.
- Open the
config.json file placed in the server/settings folder
- Create a folder on HorizonGram with the same name as the folder to be uploaded
- Look here how the profiles are enumerated
- Change the value of
active_account_index to the chosen profile number
- If you have already started the server, restart it.